How to Record Gameplay: Settings & Software for the Perfect Capture
Recording gameplay has become an essential part of the gaming community, whether you’re a content creator, a casual gamer, or someone who wants to share epic moments with friends. However, capturing your gameplay in a high-quality, smooth manner can sometimes feel overwhelming. Between choosing the right software, adjusting settings, and understanding hardware requirements, it’s easy to get lost. This article will guide you through everything you need to know about how to record gameplay, focusing on the best software options and essential settings you should tweak to ensure crystal-clear videos.
When you first decide to record your gameplay, you might think it’s as simple as pressing a button, but there’s a lot more than meets the eye. The quality of your gameplay recordings depends heavily on your settings and the recording software you use. There are differences between recording gameplay for streaming live and for editing and uploading later, so knowing your purpose helps tailor your approach. Let’s dive deep into the journey of capturing your gaming moments with the best settings and software to ensure your videos look professional.
Choosing the Right Gameplay Recording Software
The first step in how to record gameplay effectively starts with selecting the right software. There are plenty of options, each catering to different needs and levels of experience. Some gaming PCs might come with built-in recording software, while others require you to download third-party applications. Here’s a quick look at some of the most popular options.
Top Gameplay Recording Software
| Software | Key Features | Best For | Price |
|---|---|---|---|
| OBS Studio | Free, Open-source, Highly customizable, Supports streaming & recording simultaneously | Advanced users and beginners alike | Free |
| Bandicam | Easy to use, High-quality compression, Supports different video codecs | Users wanting simple setup with quality | Paid (with free trial) |
| NVIDIA ShadowPlay | Optimized for NVIDIA GPUs, Instant replay feature, Minimal performance impact | NVIDIA GPU owners | Free |
| Fraps | Simple recording, High frame rate capture, Benchmarking tools | Gamers prioritizing frame rates | Paid (with free demo) |
| Xbox Game Bar | Built into Windows 10/11, Easy access, Basic editing features | Casual gamers | Free |
With this overview, it’s easier to pick the software that suits your needs. If you want a professional setup with the freedom to customize everything, OBS Studio is your go-to. For those using NVIDIA graphics cards, ShadowPlay offers hardware-accelerated recording, which reduces the impact on your gaming performance.
Understanding Important Recording Settings
Once you’ve picked your software, understanding the correct settings is crucial to get high-quality but manageable file sizes. If you opt for poor settings, your videos might end up blurry, laggy, or too large to store easily.
Resolution and Frame Rate
The resolution and frame rate are two of the most important factors. Most gamers play at 1080p (1920×1080), which balances image quality and performance well. Increasing resolution to 1440p or 4K can improve video quality but requires a much more powerful system and leads to larger files.
Frame rates of 30fps (frames per second) are acceptable for casual video, but 60fps gives a much smoother look and is recommended for fast-paced games, as it captures more detail and reduces motion blur.
Video Bitrate
Bitrate controls how much data the video uses per second and directly impacts video clarity and file size. Higher bitrates mean better quality but result in larger files. For 1080p at 60fps, a bitrate between 10,000 and 15,000 Kbps often provides a good balance. If you increase resolution or frame rate, raising the bitrate accordingly is necessary.
Audio Settings
Clear audio is as crucial as video quality, especially if you plan to add commentary or communicate with friends. Many recording tools allow you to capture desktop sound and microphone input separately. This provides more control over audio levels during editing.
Consider recording audio at 44.1kHz or 48kHz sample rate in a stereo setup for clear and crisp sound. Avoid noisy environments or use a quality headset microphone to improve the audio experience.
File Format and Codec
Most recording software supports saving videos in MP4 or MKV formats. MP4 is widely compatible with various editing programs and platforms but sometimes has issues recovering if the recording crashes. MKV tends to be more stable during recording but may require conversion before editing.
The codec is the method used to compress the video data. H.264 is the industry standard for recording gameplay due to its balance of compression and quality.
Step-by-Step Guide to Recording Gameplay
Let’s break down the process of how to record gameplay using OBS Studio since it’s one of the most versatile and popular options.
Step 1: Download & Install OBS Studio
Head to the official OBS Studio website and download the version compatible with your operating system (Windows, Mac, or Linux). Once downloaded, follow the installation wizard to complete setup.
Step 2: Configure Video and Audio Settings
Open OBS Studio and go to Settings > Video. Set your Base (Canvas) Resolution to your monitor’s native resolution (typically 1920×1080), and set the Output (Scaled) Resolution to the same or lower if you want smaller file size. Adjust the FPS value to either 30 or 60 based on your preference.
In Settings > Output, select “Advanced” mode. Under Recording, choose your recording path (where videos will be saved), set recording format (MP4 or MKV), and configure video bitrate (start around 12,000 Kbps for 1080p 60fps). Make sure the encoder is set to either NVENC (for NVIDIA GPUs) or x264 for CPU encoding.
Go to Settings > Audio and set Desktop Audio to your speakers or headphones, and Mic/Auxiliary Audio to your microphone device.
Step 3: Add Your Game Capture Source
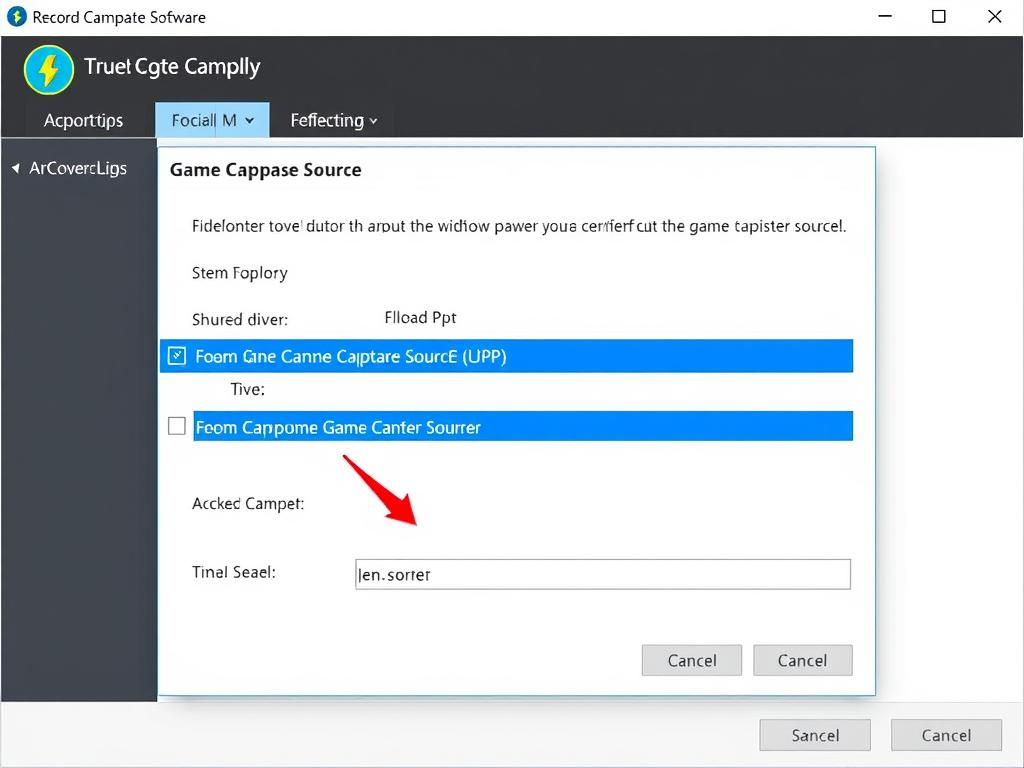
In the main OBS interface, under “Sources,” click the + icon and select “Game Capture.” Choose the option to capture any fullscreen application or specify the exact game window. You can also add “Display Capture” to record everything on your screen or “Window Capture” if you want to record a specific application.
Step 4: Test Your Setup
Before diving into serious recording sessions, test your settings. Click “Start Recording,” play your game for a few seconds, then stop. Review the footage to check video and audio quality, smoothness, and file size.
Step 5: Record Your Gameplay
When you’re ready, click “Start Recording” just before you begin your gameplay session. When done, click “Stop Recording.” Your video file will be saved to the folder you designated.
Alternative Recording Software Highlights
Not everyone will find OBS Studio the best fit, so here are brief overviews explaining when you might consider other options.
Bandicam
Bandicam focuses on simplicity and offers excellent compression technology, making your videos smaller without sacrificing too much quality. It’s perfect if you prefer an easy setup and don’t want to deal with complex settings. Bandicam also includes features like real-time drawing and webcam overlay, making it suitable for tutorials.
NVIDIA ShadowPlay
If you own an NVIDIA graphics card, ShadowPlay is a fantastic choice because it uses GPU hardware accelerated encoding, which means minimal impact on your gameplay performance. It includes an instant replay feature, perfect for capturing moments after they happen without continuously recording.
Xbox Game Bar
Built into Windows 10 and 11, Xbox Game Bar is the easiest way to record gameplay without installing anything. It supports basic capture and live streaming and offers easy keyboard shortcuts. It is especially handy for casual gamers who want quick, straightforward recording.
Tips for Optimizing Your Gameplay Recording Experience
No matter the software or settings you choose, these practical tips will improve your recording process and final video quality.
- Close Unnecessary Applications: Running multiple applications can reduce performance and recording quality. Close anything not essential to free system resources.
- Use a Separate Drive for Recordings: Store your gameplay videos on a different hard drive or SSD than your operating system to avoid IO bottlenecks.
- Check Your PC Hardware: Recording gameplay can be resource-intensive. Make sure your CPU, GPU, and RAM meet the recommended specs for your chosen software.
- Keep Drivers Updated: Updated graphics drivers and sound drivers help prevent compatibility issues and boost recording performance.
- Experiment with Settings: Don’t be afraid to tweak bitrate, resolution, and FPS until you find a balance between quality and smooth performance on your particular setup.
- Consider Using a Capture Card: For console gamers or if you want to offload recording tasks to an external device, capture cards are invaluable for high-quality capture without PC lag.
Understanding Hardware Requirements for Smooth Recording
Recording gameplay is demanding on your system, especially if you want high resolution and high frame rates combined with smooth gameplay.
| Component | Recommended Specs for 1080p 60fps Recording | Notes |
|---|---|---|
| CPU | Intel i5 9th Gen or AMD Ryzen 5 3600 | Needed for x264 encoding and general multitasking |
| GPU | NVIDIA GTX 1660 or better (for NVENC encoding) | Hardware accelerated encoding reduces CPU load |
| RAM | 16GB DDR4 | More RAM helps with multitasking and video processing |
| Storage | SSD (preferably NVMe) | Fast write speeds prevent dropped frames and lag |
If your computer falls short, consider lowering recording resolution or frame rate, as these are the biggest factors affecting performance.
Common Issues and How to Fix Them
Even with the best intentions, gameplay recording can run into a few hiccups. Here are common problems gamers face and easy fixes.
Laggy or Stuttered Recordings
This usually means your system is struggling to handle both gaming and recording simultaneously. Solutions include lowering recording resolution, switching to hardware encoding (like NVENC), or closing background apps.
Audio Out of Sync
Audio sync issues often arise from using high CPU load or mismatched settings. Try reducing bitrate or frame rate, or enable audio delay compensation in your recording software.
Recording Not Starting or Crashing
Ensure your software is updated and that you have proper permissions. Running the program as administrator and updating graphics drivers frequently fixes this.
Files Too Large
If your recordings take up too much space, reduce video bitrate or resolution, or switch to a more efficient codec if available.
Editing and Sharing Your Recorded Gameplay
Recording is just the first step; editing makes your videos engaging and ready for sharing with the world. Many gamers use simple editors like Adobe Premiere Pro, Sony Vegas, or free options like DaVinci Resolve to trim footage, add commentary, effects, and overlay graphics.
Once edited, platforms like YouTube and Twitch are popular for uploading and streaming gameplay videos. Optimize your video titles, descriptions, and thumbnails to attract viewers and build your audience.
Advanced Tips for Professional Gameplay Recording
If you want to step up your recording game, consider these advanced techniques:
- Record in Separate Audio Tracks: Capture game audio, microphone, and music in different tracks for better post-production control.
- Use Scene Transitions and Overlays: Create a professional-looking stream or video with overlays showing your camera, logo, or chat.
- Live Stream While Recording: Many softwares like OBS allow you to stream to Twitch while simultaneously recording locally at higher quality.
- Create Highlight Clips Using Instant Replay: Tools like ShadowPlay let you save the last few minutes of gameplay without recording the full session.
- Sync Multiple Cameras: For streamers using multiple camera angles, software like OBS makes it easy to switch between setups live.
Final Thoughts on How to Record Gameplay
Recording gameplay can seem daunting at first, but once you understand the right combination of software and settings, it becomes straightforward and very rewarding. Whether your goal is to share funny moments, create tutorials, or build a streaming channel, capturing clear, smooth, and high-quality game footage helps tell your story in the gaming world. Start simple, experiment with your setup, and gradually incorporate advanced tools and settings as you become more comfortable. With the right approach, recording gameplay turns from a technical challenge into a creative outlet that showcases your best gaming moments.
Conclusion
In the end, how to record gameplay effectively boils down to understanding your goals, choosing the right software, and fine-tuning your recording settings to match your hardware capabilities. Whether you’re just starting with easy-to-use built-in tools like Xbox Game Bar or diving into powerful software like OBS Studio, the key is a balance between video quality, smooth performance, and manageable file sizes. Equip yourself with basic troubleshooting skills, keep your drivers updated, and don’t be afraid to experiment. With patience and practice, you’ll be able to produce gameplay recordings that are not only impressive but truly capture the spirit and excitement of your gaming adventures.
